Saturday, July 10, 2010

Disney Theme Gifts

Here are two of my latest projects...

I spruced up this cute lantern from Ikea with Tinkerbell.  She was designed with Make the Cut Software and my Cricut.
I also altered this star dish to go with it...still keeping the Disney theme.

Monday, May 31, 2010

Votive Candle Holder with Vinyl

Just a quick post to share a quick project.  Using the vinyl, cut with the Cricut, you can decorate all sorts of things.  Here is my candle holder.  I did a quick one and heat tested it with a candle inside. It seemed to do fine.

Saturday, May 1, 2010

AWANA Grand Prix Cars

We have a tradition here. Every year we set out to make unique and cool pinewood cars that will be fast enough to win.  The number of cars varies depending on how many family members are involved with AWANA.  Every year we vow to start earlier...most years we end up starting the week before.  This year, I can say we started about a month before...somehow it still seems to come down to the last week of intense effort and the night before the race being up until the wee hours of the morning to make the finishing touches on the cars.

Well...today was the race.  Our family was up until 3am...Here is what was entered...
This is Josh's car, modeled after a WiiMote. 
I'm not sure pictures do it justice.  Tom did awesome carving it and adding the buttons.  If you have large hands, it would be just right.

A little side note...graphite is VERY MESSY!  We suran wrapped the car to try and keep it off the white.  The graphite just made its way down under the plastic....grrrrr.  Water just smears it. Dusting helps a little, but the perfect solution was a Mr. Clean Magic Eraser.  Worked like a charm to get all of the marks off!

Timmy wanted to race himself so this is his car...

He was a bit disturbed when Tom carved the back up to put the weights in.  We had fun with this one.

Melissa wanted a fast car with a message so she decided her car would be car number 1234567.  This was perfect for doing the 7 days of creation.  Her drawings were cute! and yes her car was fast.

The final results of the race...
    Joshua, 4th place Speed for TNT Clubbers.
    Timmy, 1st place Speed for Sparks and 3rd Overall.
    Melissa, 2nd place Speed for Open Class.

The following are some of the cars we've entered over the past several years.  I wanted to share, because I'm so proud of Tom's workmanship and attention to details.

Saturday, April 17, 2010

Garage Sale Find

Maybe I take this coordination thing a bit far? :)  We were at JC Penny's last night and I had found a cute plaid purse, but didn't buy it because they lined it with orange (yuck!)  I asked my daughter where the polka dotted purses were when you needed them.  She couldn't think of a time that you would need anything polka dotted.  Hmmmm. 

Checked out a few garage sales today and look what I found!  Woo Hoo!  It was just waiting for me. (And only a dollar! :) )  I think we "needed" each other.

Friday, April 9, 2010

Bowls to Match My Cricut

Date Night tonight...WooHoo!  As my Honey and I were casually strolling around Costco, (doesn't everybody go to Costco for their dates?)  we ran into the Cricut demonstrators, peddling their wares.  After chatting with them and drooling over the Heritage cartridge, I showed them the picture of my polka dotted Cricut on my polka dotted cell phone.  Next we ran smack dab into an end cap with a stack of these bowls.  Talk about instant attraction!  And they were such a bargain! Stoneware is my other passion, next to paper crafting :)  Ya just gotta LOVE Costco!

A Couple More Sweets

Here is a little gift and a gift bag to go with the cake theme.  Check out the cupcake flower...I just love those!

Have Your Cake and Diet Too!

Okay...I have always been enamored with Pop Up paper stuff.  Way back in second grade, in Miss Bender's class I can remember having little pop up carrot noses on my construction paper snowmen.  How elated I was to learn simple pop ups when I started stamping.  Fast forward 19 years...now I  see the awesome Sizzix die for a pop up cake...the whole cake not just a flat one that stands up.  Cool!  But, I don't like the $40 price tag...there's gotta be a way to make a similar cake on the Cricut.  After investigating a bit, I came up with my own version.  I still have some tweaking to do, but it does work.  The following is a tutorial of my version of the Pop Up Cake.  It's a bit long and photo intensive, but I think if you're struggling with puting one together, with the Sizzix or home made version, it should help.

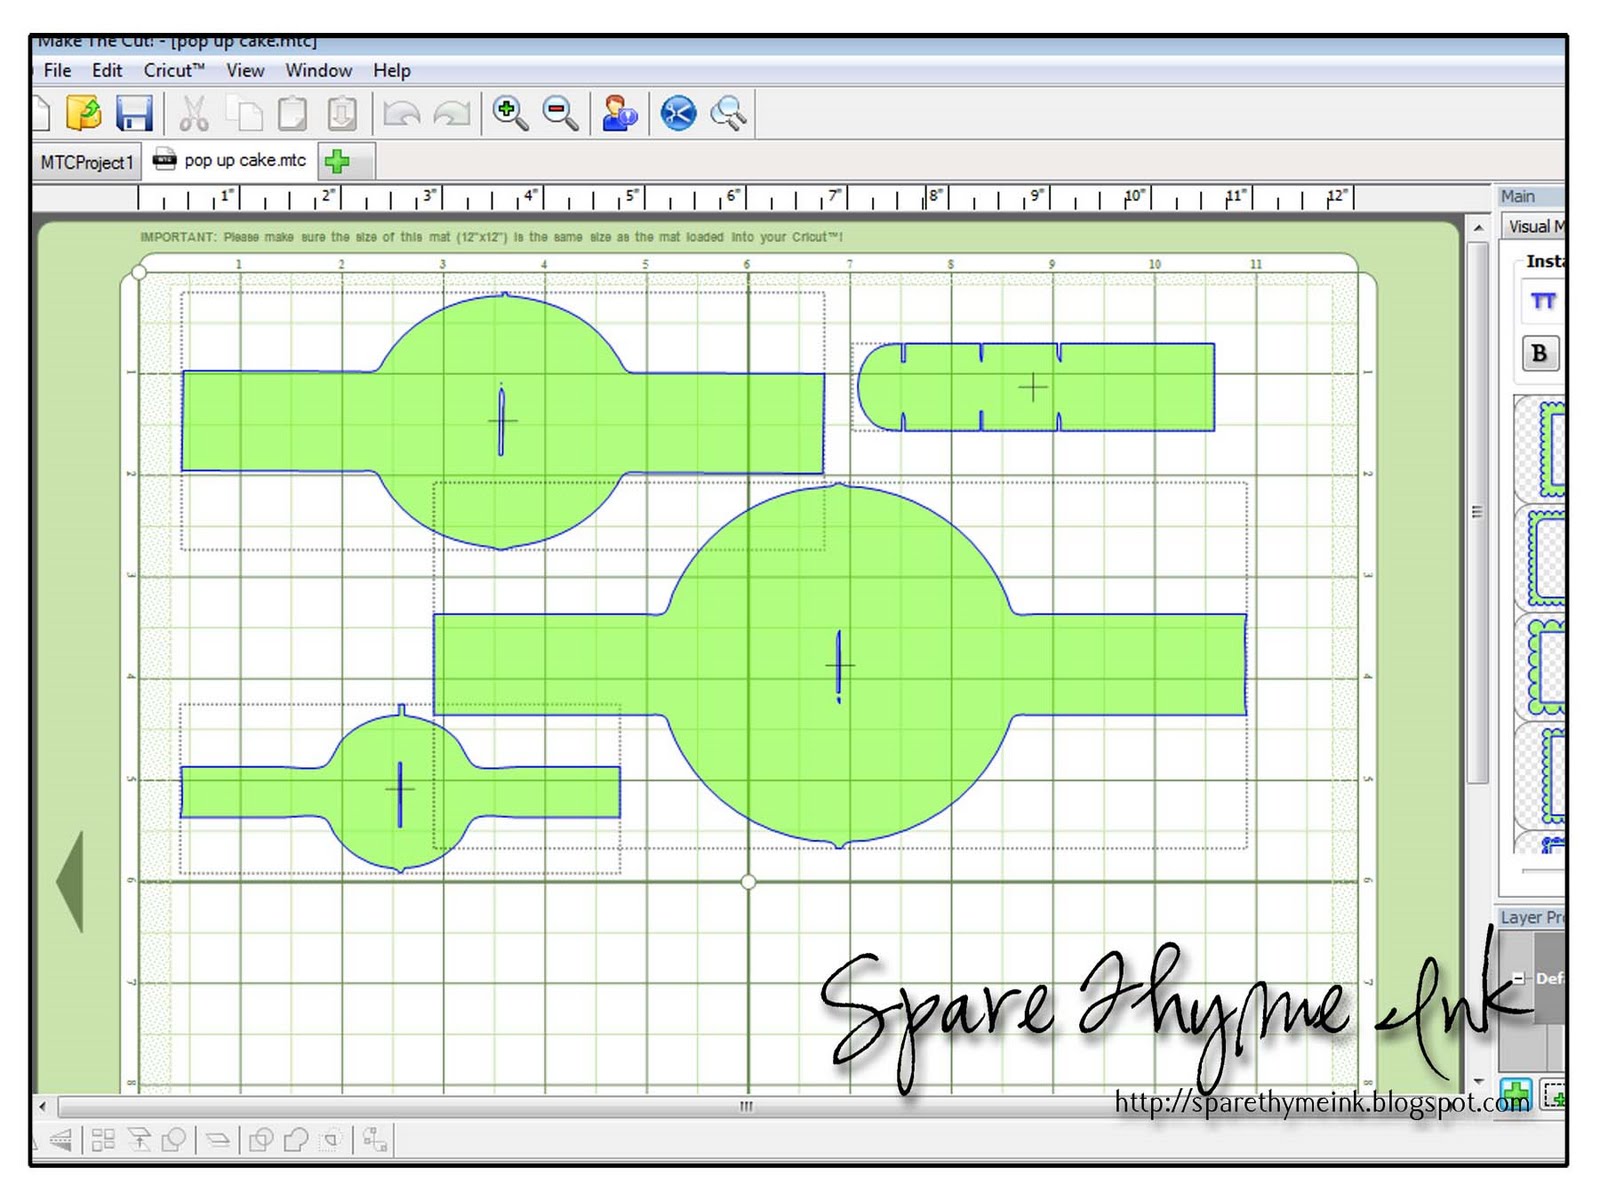
I used Photoshop Elements to create my image and then imported it into the Make the Cut Program.  I sized it  so that it would all fit onto an 8.5x11 piece of paper.

Remember, you can flip you mat around using the opposite corner for  your paper. :)
Cut the image out.

Next you will need to score the pieces.
A couple of tips...
1. The long center piece can be "eyeballed" for its score lines.
2. With my pattern, I put little tabs on the circle to line up with the score lines, It really helps get them straighter.  Don't forget to trim them off afterward though!
3. Putting a scrap of paper 3/4 inches wide away from the score line helps to line up the circle edge the correct distance.  (This may be different for other patterns, but it is the cake height that I decided on.)
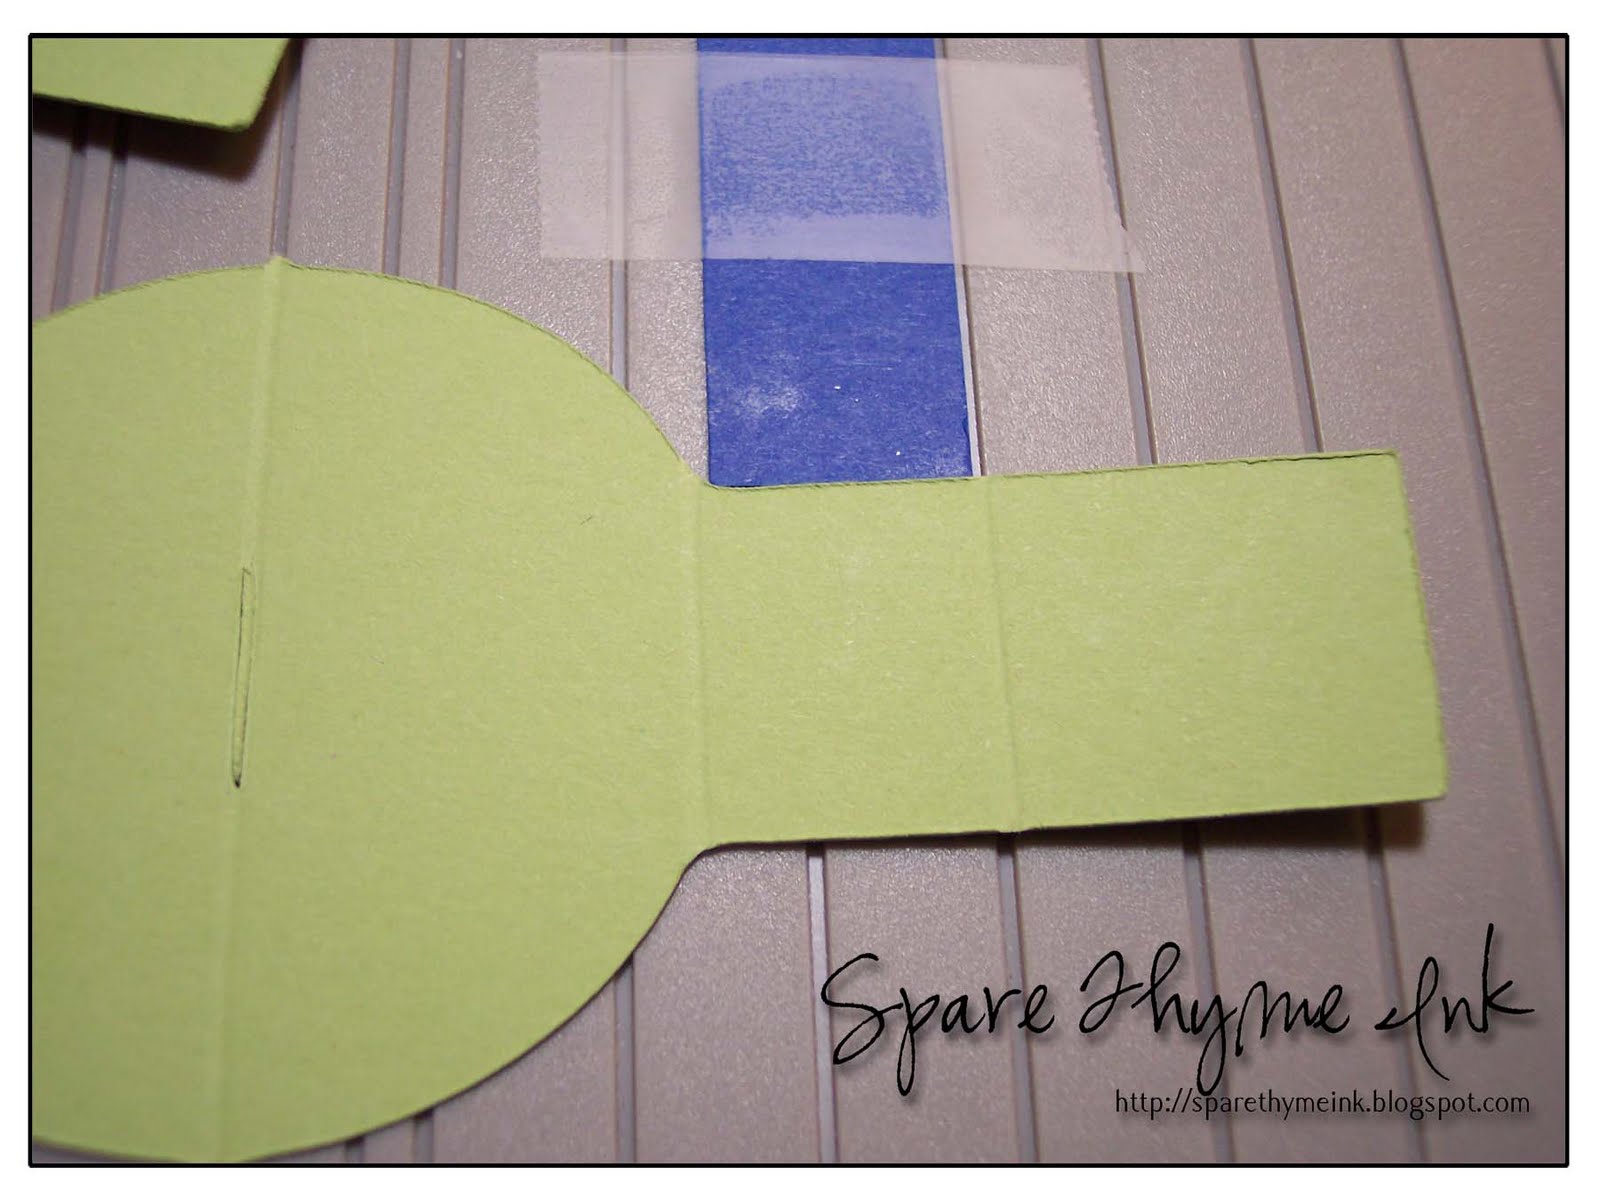
Once the pieces are all scored and pre-folded add adhesive to the rectangles farthest from the circle.  (See picture above.)  ScorTape seems to work really well for this.  Whatever you use, make sure it's heavy duty, a lot of wear and tear happens on these parts.

Stick the center piece right next to the fold line.

Slide the largest layer down, folding in the sides.  Let it rest on the lowest tab and fold out the middle one to lock it in place.
Fold the cake layer in half and push to one side.
Remove the adhesive covers and then fold the opposite side over so that the card adheres to exposed sticky tape.
Open up the card and do the same steps for the opposite side.
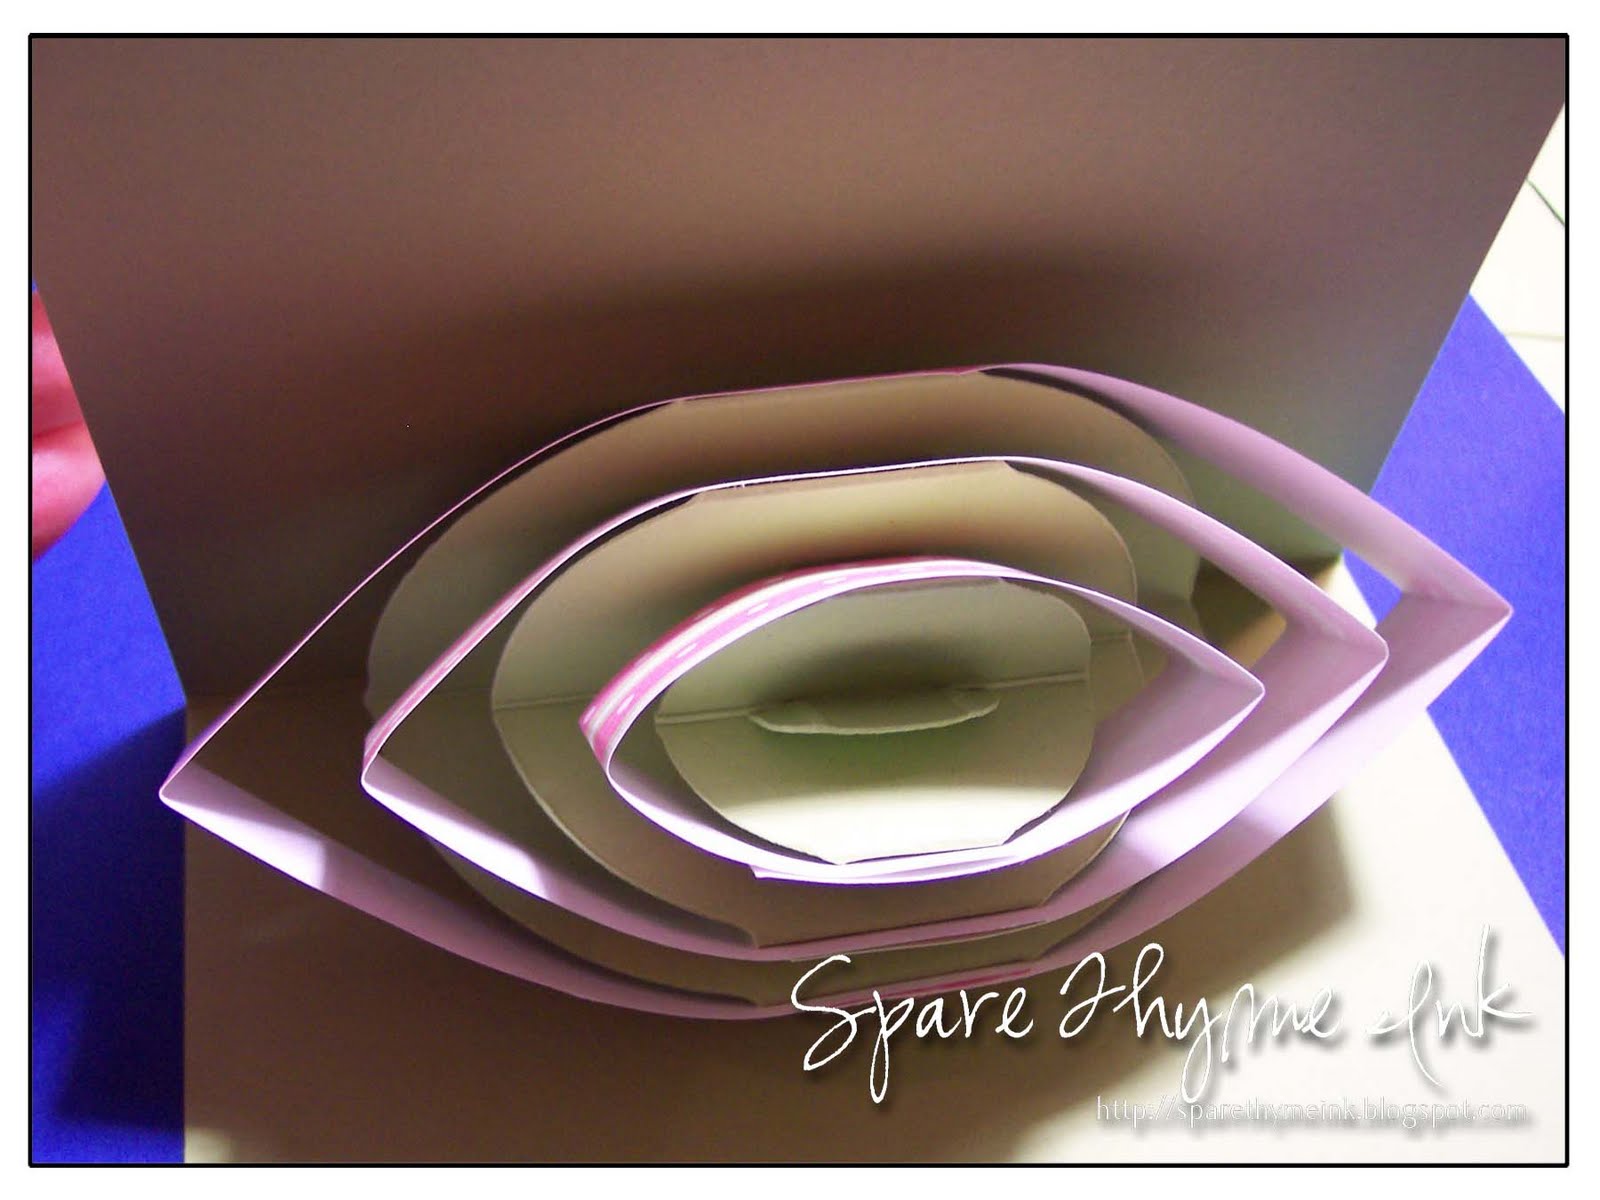
When you open the card it should stand with the top of the layer parallel to the flat card. (Notice I forgot to trim my tabs...I did eventually take care of it though.)

Repeat the steps with the next two layers.  They will adhere to the cake layer below them.


Next you will need to trim a 12 x 12 piece of paper into strips for around the edges.  Since my cake height was 3/4 inch I made strips that were just a smidge wider than that.  The bottom layer takes the whole 12 inches.  I trimmed the smaller layers after I had it wrapped around the cake.

Tip:  I chose to put my seems on the top of the card, so when you have it open it's opposite the recipient.
Once you have all your "frosting" on, you will need fold the card to put the creases in it.
Once that is done, you are free to decorate the cake.  A note of caution, it is pretty bulky, so consider that if you're thinking of popping it in the mail.  Also you don't want your candle sticking out the top, so don't make them too tall.  (Don't ask me how I know this. :) )

Here is a finished cake...different frosting though.  I also thought it needed a doily and added that for fun.

And the front...