

Showing posts with label Christmas. Show all posts
Showing posts with label Christmas. Show all posts
Friday, January 6, 2012
Bling-y Thanks
Here's my second project using the new Silhouette. I designed it in the Silhouette Studio, which I am still figuring out.
 The holly is from their website, but the Thanks is using one of my fonts. I decided to use vinyl on this to test detail cutting, and I figured it would be easier to stick down. I think it does a pretty nice job! I used glossy card stock and 3 stick on rhinestones from Michael's


Thursday, December 22, 2011
Package Tree
Sorry to be MIA. So many things I'd like to post are gifts and I really like to keep those a secret before giving them away. But...here's a quick project, inspired by this cake stand tree I found on Pinterest. (If you haven't discovered it yet, it is addictive inspiration for all sorts of ideas, projects, photos and recipes...and so much more! Leave your email if you need an invite.)
I needed a centerpiece for our family get together. Somehow I'm always intimidated by centerpieces. I'm not gifted with flowers and I never want to spend money on them. So...here's my inexpensive, Pinterest inspired centerpiece.

I used scrapbook paper so I could get a good monochromatic look. I stacked two little boxes for the trunk and attached the trunk to the tree with glue dots.
I needed a centerpiece for our family get together. Somehow I'm always intimidated by centerpieces. I'm not gifted with flowers and I never want to spend money on them. So...here's my inexpensive, Pinterest inspired centerpiece.

I used scrapbook paper so I could get a good monochromatic look. I stacked two little boxes for the trunk and attached the trunk to the tree with glue dots.
Tuesday, September 13, 2011
Nativity Project
I've been trying to get some of my projects done for Christmas. I purchased the three Nativity sets from My Scrap Chick with this particular craft in mind. It took me a few days of planning, since this set didn't have registration marks to help with sizing. I spent a couple of weekends cutting and chalking and finally getting it assembled. I'm happy with how it turned out, but have to admit it was a LOT of work. Not sure I'll make more at this point.
 Lots of Mini Brads were used for the eyes. I highlighted them with a white gel pen. I also used a ton of mounting tape to add dimension to most everything.
 I used my Zyron with the Permanent Adhesive cartridge on the star and then used Ultra Fine Prisma Glitter on it. Also...notice the mini stars. They're from a finger nail bling set from the Target dollar section.


 I used the Cuttlebug and Swiss Dots folder on the sheep to give them some texture.
 Here's the collection all finished.


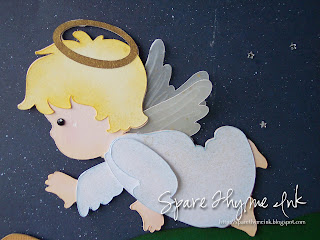
I used Shimmer Mist on the Angel as well as many of the Kings' elements.


Ran the camel saddle through the Cuttlebug and then rubbed VersaMark ink on it, before sprinkling with gold embossing powder and heated.


Saturday, December 25, 2010
Our Advent Calendar
A few years back a friend shared this project with me. Taking a 24 cup mini muffin tin, prime it and paint it. Line the insides of each muffin spot with Christmas paper. A 1-1/4 inch circle punch was perfect for this. Cut chipboard (from cereal boxes or the backs of paper pads) into squares to fit over the muffin spots. Adhere cute Christmas paper to the chipboard and sand edges. Glue magnet strips along two parrallel edges on the back of each chipboard square. Decorate the squares and then fill with notes, verses, candy, gifts etc.


Here is ours.

On the first day, the slip of paper directs us to make a Stable. We've done it out of graham crackers, Legos and I can't remember what else. I made little Sculpey Nativity figures to "discover" through the month. Baby Jesus is always the last day. (By the way...the snake thing was my son's contribution.) Every morning it's a rush to the advent calendar to see what Bible verse, challenge and possible figure there is for the day.


Friday, December 24, 2010

Subscribe to:
Posts (Atom)